Tampilkan postingan dengan label how. Tampilkan semua postingan

How to Clean a Laptop Screen

Be careful when attempting to clean a Laptop screen or LCD monitor as there are many chemicals that can damage the finish of a Laptop screen or LCD monitor. In addition, you should ensure that the fabric used in conjunction with the chemical is not too abrasive or harsh or you risk scratching the screen surface. In the following simple solution, I will show you what I personally use to clean my LCD screens.

Chemicals to use to clean a Laptop Screen:

DO NOT USE: Rubbing alcohol in any concentration

Although it has been mentioned that 91% pure alcohol is safe for LCD monitor cleaning, I strongly suggest avoiding it. There are many different plastic protective surfaces used on the market and some are NOT tolerant of alcohol. In addition, it can extensively dry out the surface and cause other issues down the road.

DO NOT USE: Windex or other ammonia based products

Ammonia will, over time, gradually eat away at the composition of the screen causing it to become brittle, yellow and eventually crack.

DO USE: Water for mild cleaning and dust removal

DO USE: 50% water and 50% vinegar mixture

A vinegar and water mixture can be used to remove water spots, pop stains, splashes and streaks and smudges from your flat screen without doing harm to the surface.

Tip: Some eyeglass cleaning kits use a vinegar/water solution.

Fabric to use to clean a Laptop Screen:

DO NOT USE: Newspaper, tissue paper or toilet paper

Newspaper, tissue paper and toilet paper contain wood fibers that can easily scratch the surface.

DO USE: Microfiber cloths

Microfiber cloths are typically included with new laptops. They are also commonly used to clean eye glasses and are safe to use on a Laptop or LCD screen surface.


Cleaning a Laptop or LCD Screen:


  1. Find a Microfiber cloth to use for cleaning
  2. Gently wipe the screen surface clean using the microfiber cloth
  3. Mix 1 part of water to 1 part of vinegar in a spray bottle
  4. Spray a mist of the water/vinegar solution onto your microfiber cloth
  5. Using the misted microfiber cloth, gently wipe the screen surface. Go against streaks to remove them, Use a swirling motion to remove spots or splatter marks.


http://www.lancelhoff.com/how-to-clean-a-laptop-screen/
Read More..

How to Reset Canon MP800 MP820 MP810 MP830 MP960 MP970

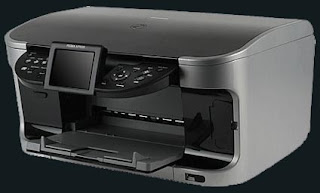
Printer Canon MP800Below the instruction to reset Canon MP800, MP820, MP810, MP830, MP960, MP970

  1. Start with printer off
  2. Press and hold resume Button (triangle in the circle) and click “Power” button. green led should be on
  3. While holding the Power button, release the Resume Button.
  4. Without releasing the Power Button, click “Resume” button for two times and release Both Buttons.
  5. Click “Resume” for four times then soon click “Power” button, to confirm the selected action (reset counter absorber).
  6. Turn off the printer and turn on again
Read More..

How to Change Windows 7 Folder Background

Are you Windows 7 users? If you are bored with the folder background on your Windows 7 don’t be worry, you can change it so look beautiful.
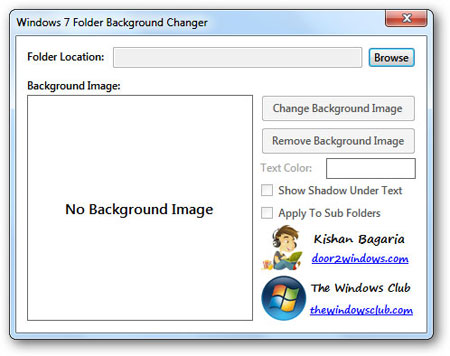
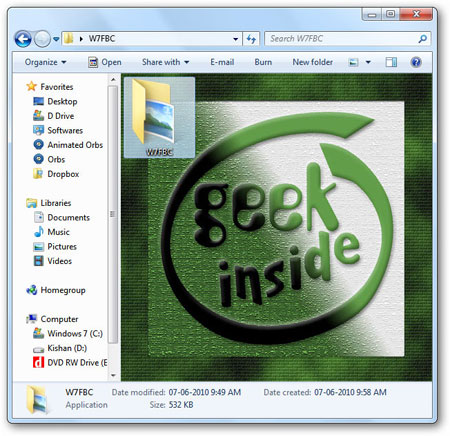
Tricks-collections.com would be share how to change your Windows 7 folder background, a lot of tricks that can use to change Windows 7 folder background, one of them is Windows 7 Folder Background Changer, this application is a free tiny portable tool that allows you to change any folder’s background & text color in Windows 7/Vista. Currently the latest version for Windows 7 Folder Background Changer is 1.1.
Please follow the steps below to start use this application:
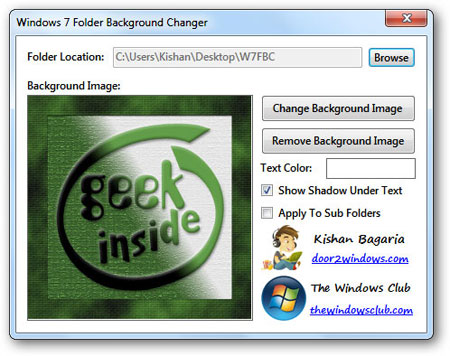
  1. Run the tool as administrator. If you have run this tool for the first time then it will restart Explorer.
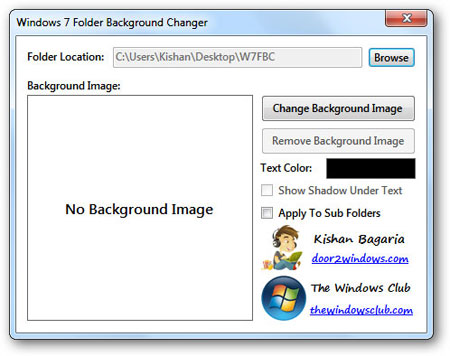
  2. Click on Browse and browse for the folder of which you want to change the background/text color.
    How to Change Windows 7 Folder Background 2
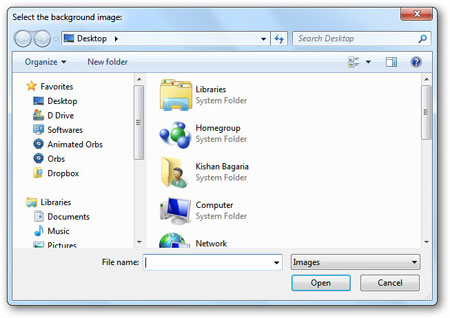
  3. Click on Change Background Image and browse for the image that you want to set as the background of the folder.
    How to Change Windows 7 Folder Background 3
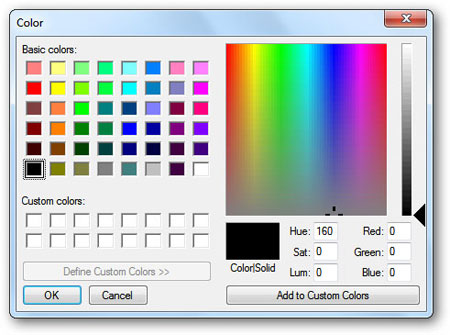
  4. Click on the Black color rectangle and select the color that you want to set as the text color of the folder.
    How to Change Windows 7 Folder Background 4
  5. If you want to display a shadow under the text of all the items in the folder, select Show Shadow Under Text. This option will only work with icons view.
  6. If you want the style of this folder to be applied to all the sub-folders, select Apply To Sub Folders.
    How to Change Windows 7 Folder Background 5
    How to Change Windows 7 Folder Background 6
If you interested to use this application you can download it here
Read More..

How to Turn Your Laptop Into JARVIS From Iron Man !


Turn Your Laptop Into J.A.R.V.I.S From Iron Man.

Turn your laptop into super smart Jarvis in 15 Minutes :

You have probably heard about the Iron Man Personal Assistant, aka J.A.R.V.I.S, you would have wondered if you could convert your laptop/desktop into a full featured robotic assistant,you could do it.And it is pretty easy. Although you might not be able to launch missiles and deploy security armor, you can do easy tasks like asking for weather, shutting PC down, pimp its interface etc etc...

So Lets Get It Started,What Do You Need :

  • # Windows 7 or 8 ( 7 is just great, 8 will work, vista & XP will not work )
  • # Windows Speech Recognition Macros. https://dl.dropbox.com/u/2362886/WSRMacros.msi
  • # A Bluetooth/Wireless Headset With Mic (optional) or a Laptop
  • # JARVIS Theme. (read below)

So That You Dont Get Confused :

We have divided the "convert-to-jarvis" mission into 3 Divisions :
- Training The Windows Speech Recognition Program.
- Setting Up The Windows Speech Macros.
- Setting Up The J.A.R.V.I.S Interface.


Step One : Train Your Windows Speech Recognition Program : 5 Minutes :

Yeah I Know, A Basic Step, But The Most Important part of "convert-to-jarvis" mission, what you gotta do is fire up the windows speech recognition program, which comes pre-installed with the Windows, way to access it is via start bar. Now choose the required Fields,and after it is done, visit the "Train your computer to better understand you" section, it is not necessary for people with clear voice/accent, but I strongly advise you to spend at least 5 Minutes on this so your computer can understand you better.


Step Two : Setting Up The Windows Speech Recognition Macros : 5 Minutes :

Now if you Have set-up-ed the Windows Speech Recog Program, you would have been trying out all sorts of cool commands, But now to spice it up, Well use the Windows Speech Macros.I assume you would have already downloaded it from the link above and installed it.After Installing it i would advise you to put its shortcuts in two places, One in the desktop and other in the start-up folder, so it would start the second your computer boots up.So a little walk through to this software, This is a super-cool, little software that teaches your computer to talk to you interactively.Here is how to set up the commands :
Double Click The Macros Icon, and when the window pops up asking "What should the macro do?" click "Advanced." For those of you familiar with creating websites, this should be a welcome site. WSRM uses XML for commands... which makes creating custom commands relatively simple. For those of you who arent aware of XML, its still easy.Here Is A Little Sypnosis at what are you looking at :

<speechMacros> - This is the starting Tag, it just tells the computer that this XML file uses the Speech Macros to execute.

<command> - This is the command to be executed. Each command is basically one action... in most cases you will only need one, but for some automations youll want to include more than one. Youll see an example of this later.

<listenFor></listenFor> - This tells the computer what word or phrase to listen for in order to do an action. Notice that there is a closing tag (</listenFor>), this tells the XML that this spot in the code is where to stop doing whatever function... in this case stop listening for a word or phrase once the computer hears it.

</command> - The closing tag for the "Command" tag... again, in XML every tag will have an opening/closing tag and what happens between the two is how it knows what to execute. In this case it knows that the command is finished once the word/phrase has been detected.

</speechMacros> - By now I think you can figure out why this is here.

Since Im going to name my computer Jarvis, Im going to tell my computer to listen for its name by changing the <listenFor> tags to say the following : <listenFor>Jarvis</listenFor>

Here Is A Little Applet That will teach my laptop to Reply Me :
_________________________________________________________________________________
<speechMacros>
<command>
<listenFor>Wake Up Jarvis</listenFor>
<speak>Systems Online, Database Check, Good Morning Sir !</speak>
</command>
</speechMacros>
_________________________________________________________________________________

So Whenever I Say "Hey Jarvis" My Computer will reply me with "System Online,Database Check, Good Morning Sir ! ", You can change it to whatever you like !

An Speech Macro For Getting The Weather :
_________________________________________________________________________________

<?xml version="1.0" encoding="UTF-16"?>
<speechMacros>
<command>
<listenFor>Pull up the weather in [CityName]</listenFor>
<run command="http://www.weather.com/weather/local/%7B[CityName.zipCode]%7D"/>
</command>
<command>
<listenFor>Is it cold in [CityName]?</listenFor>
<speak>Let me check... just a moment.</speak>
<script language="JScript">
<![CDATA[
<var xml_doc = new ActiveXObject("Microsoft.XMLDOM");
<xml_doc.async = false;
<xml_doc.load("http://www.rssweather.com/zipcode/%7B[zipCode]%7D/rss.php");
<var titles = xml_doc.getElementsByTagName("title");
<var descriptions = xml_doc.getElementsByTagName("description");
<Application.Speak(titles.item(2).text + " in {[*CityName]}");
<Application.Speak(descriptions.item(2).text);]]>
</script>
</command>
<listenForList name="CityName" propname="zipCode">
<item propval="65201">Columbia</item>
<item propval="37201">Nashville</item>
</listenForList>
</speechMacros>
_________________________________________________________________________________

A Macro To Restart The Computer :
You will just have to say "Nuke It!" and the computer will restart :
_________________________________________________________________________________

<speechMacros>
<command>
<listenFor>Nuke it</listenFor>
<speak>Rebooting The System.</speak>
<run command="C:WindowsSystem32shutdown.exe" params="-r -t 00"/>
</command>
</speechMacros>
_________________________________________________________________________________

Another One To Shut Down The Computer :
You will have to say "Goodbye Jarvis" And the Pc Will Shut Down :
_________________________________________________________________________________

<speechMacros>
<command>
<listenFor>GoodBye Jarvis !</listenFor>
<speak>Getting Offline,Bye Sir</speak>
<run command="C:WindowsSystem32shutdown.exe" params="-s -t 00"/>
</command>
</speechMacros>
_________________________________________________________________________________

Download This Pretty Little App And Extract It To C:NIR and you will add more intelligence to your PC :

Volume Up:

<speechMacros>
<command>
<listenFor>volume up</listenFor>
<run command="C:
ir
ircmd.exe" params="changesysvolume +5000"/>
<speak>Volume Up</speak>
</command>
</speechMacros>
_________________________________________________________________________________

Volume Down:

<speechMacros>
<command>
<listenFor>volume down</listenFor>
<run command="C:
ir
ircmd.exe" params="changesysvolume -5000"/>
<speak>Volume Down</speak>
</command>
</speechMacros>
_________________________________________________________________________________

Volume Medium :

<speechMacros>
<command>
<listenFor>volume medium</listenFor>
<run command="C:
ir
ircmd.exe" params="setsysvolume 30000"/>
<speak>Volume at medium listening level</speak>
</command>
</speechMacros>
_________________________________________________________________________________

For More Interactivity, install Voice Search on Google chrome or some similar app in firefox !

Step Three : Pimping The Interface : 5 Minutes :

So well we have completed the talking and replying part, but we dont need the old crappy windows desktop, we need a kick ass interactive desktop so our computer looks like jarvis, to do that we will install this theme from Devianart.

http://hell999.deviantart.com/art/IronMan-Jarvis-Theme-Download-259211144

After that we will need to pimp up the start of windows, to do that we will download this little utility called Bootchanger

http://hell999.deviantart.com/art/IronMan-Jarvis-Theme-Download-259211144

and getting a boot screen animation of your choice form here

http://windows7bootscreens.com/

then you are done.

Welcome To Jarvis !

So Whats Next ? We think using RFIDs tags and attaching CCTVs cameras to it. We could also connect arduino and sub computers to control lightning and other electronics component, We could also add a IR Receiver to add remote functionality ! What do you think we could do next ?

Drop your comments below please; You feedback can lead to bigger & better posts  ^_^


COMMENTS:

Read More..